Dashboard
The Dashboard provides an intuitive display providing real time monitoring information.
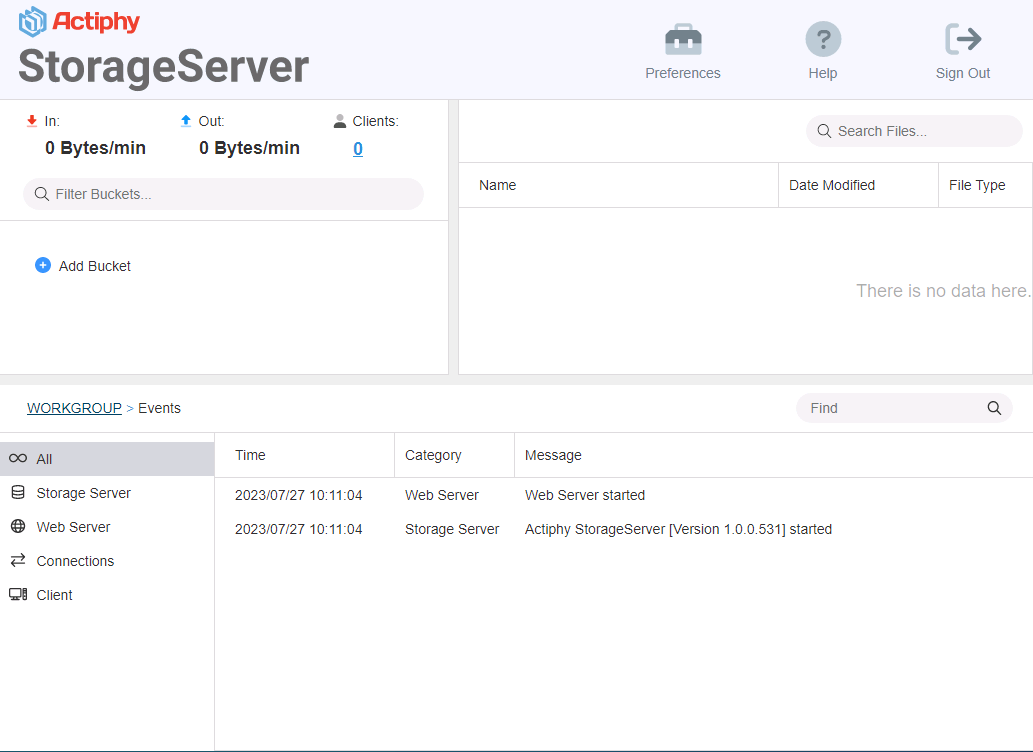
Network Communication Status

The current communication status (received and transmitted data volume) and the number of the connected clients is displayed.
By clicking on the received / transmitted data volume, you can select the display format [bits / sec] or [bps].
Click on the number of the connected clients. You can monitor the information for the respective connected clients.
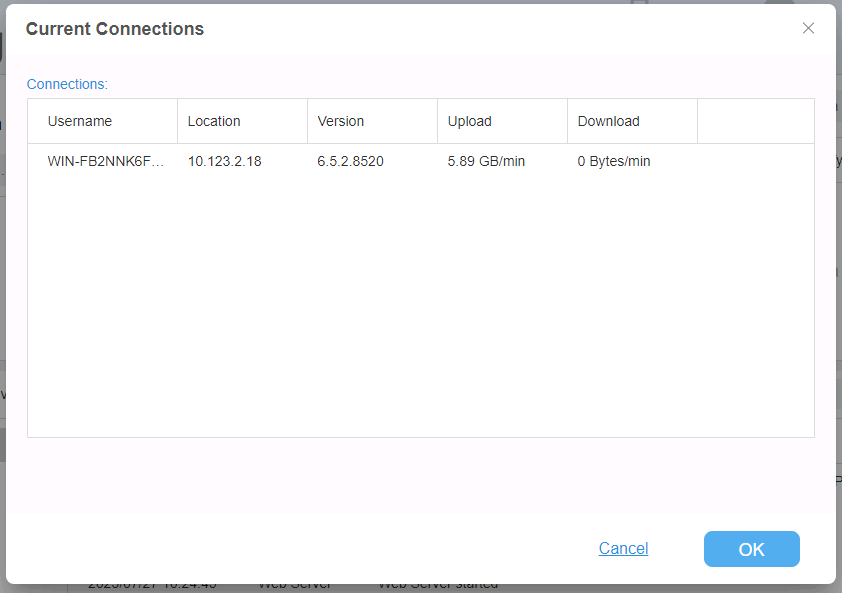
The received / transmitted data volume from / to ActiveImage Protector and the received data volume from Actiphy ImageCenter (with StorageServer) and Actiphy StorageServer are displayed.
When selecting [Browse Image] - [Image Browser], or while individual items are being downloaded from an image in [Browse Image], you can monitor the image mount status under [x Mounting]. You can unmount the image that is not downloaded yet.
Bucket Tree
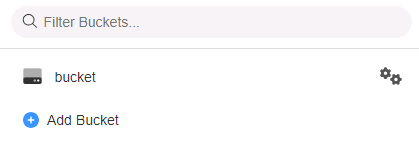
You can create and manage the buckets. The following items are displayed in the tree:
-
All Bucket
The created buckets are displayed. When connection to ActiveImage Protector client is established, the created buckets are displayed. Expand this item and the client alias is displayed. -
Client Alias
ActiveImage Protector client alias which the backup task was executed.
Ex: ACTIPHY-DEMOExpand this item and image aliases are displayed. Right-click on the unnecessary items to delete after deleting every image sets.
-
Image Alias An alias based on the image type is displayed.
Create New Bucket
Click [Add new bucket] to add a new bucket.
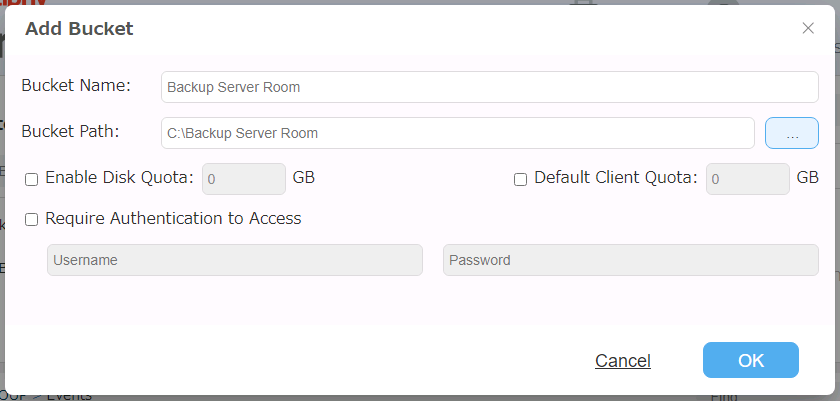
Please configure the following:
-
Bucket Name Bucket name is displayed when the connection from ActiveImage Protector client to StorageServer is established.
When a bucket is created without defining the bucket name, the new bucket is created under the name “Bucket_
"." -
Bucket Path
Please specify the path of the location to configure the bucket. When [Do not automatically create sub-folder in name of Bucket Name] option is disabled, the image file can be saved in the path specified without creating the subfolder.When the bucket is created without specifying the path, the bucket is configured in the path specified by selecting [Preference] - [Storage].
-
Enable Disk Quota Please specify the maximum limit of the disk space allocated to the disk.
When the used disk space exceeds the limit while running the backup task for ActiveImage Protector client, the backup process continues.
When the backup task starts while the used disk space exceeds the limit, the backup task for ActiveImage Protector client fails in Error -800. -
Default Client Quota
Please specify the maximum limit of the disk space allocated to the new client.When the used disk space exceeds the limit while running the backup task for ActiveImage Protector client, the backup process continues.
When the backup task starts while the used disk space exceeds the limit, the backup task for ActiveImage Protector client fails in Error -802. -
Require Authentication to Access
Enable [Require Authentication to Access] option to request for authentication before accessing a client.
When specifying a bucket as the backup destination from ActiveImage Protector Client Version 8.1 or earlier, please specify the bucket from [Actiphy ImageCenter].
Inter-File Deduplication
This product provides Inter-File Deduplication feature enabling to deduplicate across files within a bucket. Inter-File Deduplication is performed at the following times:
- When a new base image files is created
- When Consolidation of incremental image files is performed.
Since Inter-File Deduplication is performed across files, this feature cannot be used independently for an image file copied using Windows Explorer. In order to retrieve an image file in operable state, go to [Bucket View] - [Image Set List] and select the image alias and run [Export Image] in the right-click menu.
Image files replicated to a remote storage can be used independently.
Inter-File Deduplication across bucket is not supported.
Bucket View tab
When selecting an image alias in the bucket tree, the Image Set List is displayed on the [Bucket View] tab in the right pane.
-
Alias for an Agent-Based Backup Image This alias is displayed as the name of the client that performed [Volume Backup]. Ex: actiphy-demo
Image files created from a single disk or multiple disks with [Designate a separate image file set per disk] enabled are displayed in the right pane as follows. The red highlighted area indicates the disk number, and the blue highlighted area indicates the generation.
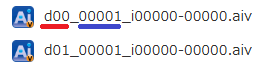
Image files created from multiple disks with [Designate a separate image file set per disk] disabled are displayed in the right pane as follows. The red highlighted area indicates that multiple disks are included, and the blue highlighted area indicates the generation.

-
Alias for an HyperBack Image Backup source virtual machine name selected for [HyperBack] is displayed. Ex: Actiphy_VM
The image file is displayed in the right pane as follows.
The red highlighted area indicates that the image is created as a VM image, and the blue highlighted area indicates the generation.
If the image was created as a Multi-VM (MVM) image, it is displayed as [MVM (VM Name…)].
Ex: MVM(Actiphy_VM2…)Image files are displayed in the right pane as follows.
The red highlighted area indicates that multiple virtual machines are included, and the blue highlighted area indicates the generation.
Items that are no longer needed can be deleted from the right-click menu after all image sets have been deleted.
Right-click Menu
Right-click an image set and select the following operation in the right-click menu.
-
Status of Workflow You can monitor the status of the respective states in Workflow.
-
Browse Image
You can mount and browse an image and download any file or folder.
When selecting a file, you can select any destination and download it. When selecting a folder, it is downloaded as a ZIP archive to the download folder on the Web browser.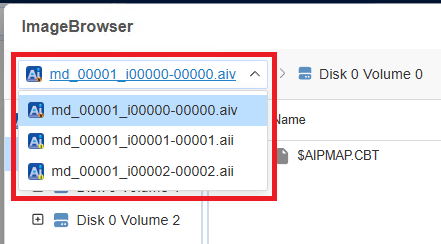
When a file is selected, you can specify a destination and download it. When a folder is selected, it is downloaded as a ZIP archive to the web browser’s download folder.
If more disks are mounted than the number of available drive letters on the system, the image contents may not be displayed. In this case, unmount any unnecessary disks and try browsing the image again.
You can check the mount status and unmount unused disks from [x Mounting] at the top of the dashboard. -
Export Images
You can export an image file in a standalone, usable format. The export is performed via Web browser.-
Google Chrome、Micrsoft Edge
You can specify the destination folder for the export. Because the Web browser must be granted permission to edit files in the specified destination folder, you cannot specify a folder that contains system files. You are recommended to specify a newly created folder.If [Safe Browsing] is enabled in Google Chrome, the Web browser may block the export of large image files.
In this case, temporarily change [Safe Browsing] to [No protection] and try again, or export the image as a ZIP archive. The ZIP archive is saved to the Web browser’s download folder. -
Mozilla Firefox
Only export as a ZIP archive is available. The ZIP archive is saved to the Web browser’s download folder.
Please do not close the Web browser or the tab where the export is in progress. Otherwise, the export may fail before it is completed.
-
*Add Image Password
You can add the password to be used when running BootCheck on password-protected images. You can configure the password to use when running BootCheck on password-protected images.
- One-time Task
You can select to run Verify, Consolidation, BootCheck or Replication task.
For more details, please access here.
Workflow Setting tab
Selecting this tab allows you to configure a Workflow for the hierarchy currently selected in the bucket tree.
For more details, please access here.
Replication View tab
Selecting this tab allows you to monitor the replication status of the hierarchy currently selected in the bucket tree. For more details, please access here.
Current Task
Tasks currently in progress are listed. You can also cancel selected tasks individually. If you want to temporarily prevent Workflows from starting for server maintenance, enable [Prevent new tasks from running].
Event
Various events are displayed.
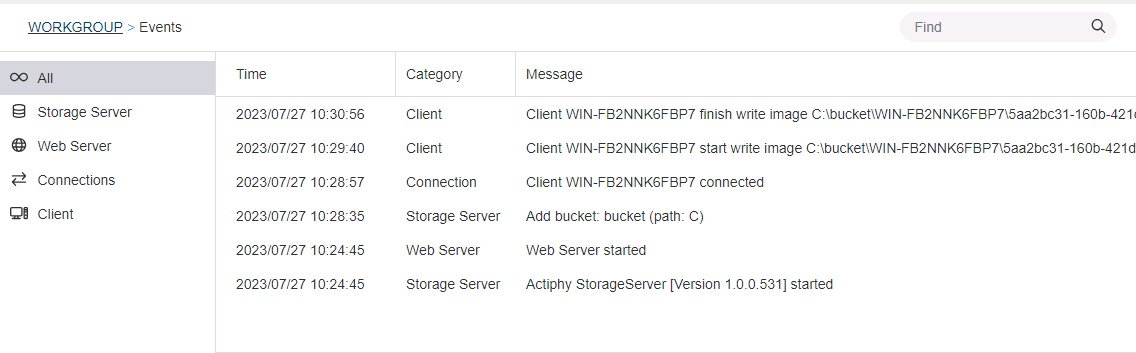
You can filter the item types displayed using  .
.
For items with task logs, you can view the log details by clicking in the Log column. For items with task logs, click in the Log column to open the task log and view its details in  .
.